Table of contents
Prerequisites
In order to install and run Distrinet on Amazon EC2, ensure your system meets the requirements described in this section. Distrinet is compatible with python 3.6 or greater versions.
What is needed:
- Distrinet installed on the machine (or in Docker), if not please follow these instructions,
- an Amazon AWS account link,
- a text editor - vim is used in our case.
AWS configuration
The AWS credentials have to be provided in ~/.aws/credentials. You can create your aws_access_key_id and aws_secret_access_key from the AWS Web interface:
mkdir ~/.aws
vim ~/.aws/credentials
File ~/.aws/credentials:
[default]
aws_access_key_id=XXXXXXXXXXXXXXXXX
aws_secret_access_key=YYYYYYYYYYYYYYYYYYYYYY
Create aws_access_key_id and aws_secret_access_key via AWS Web interface
-
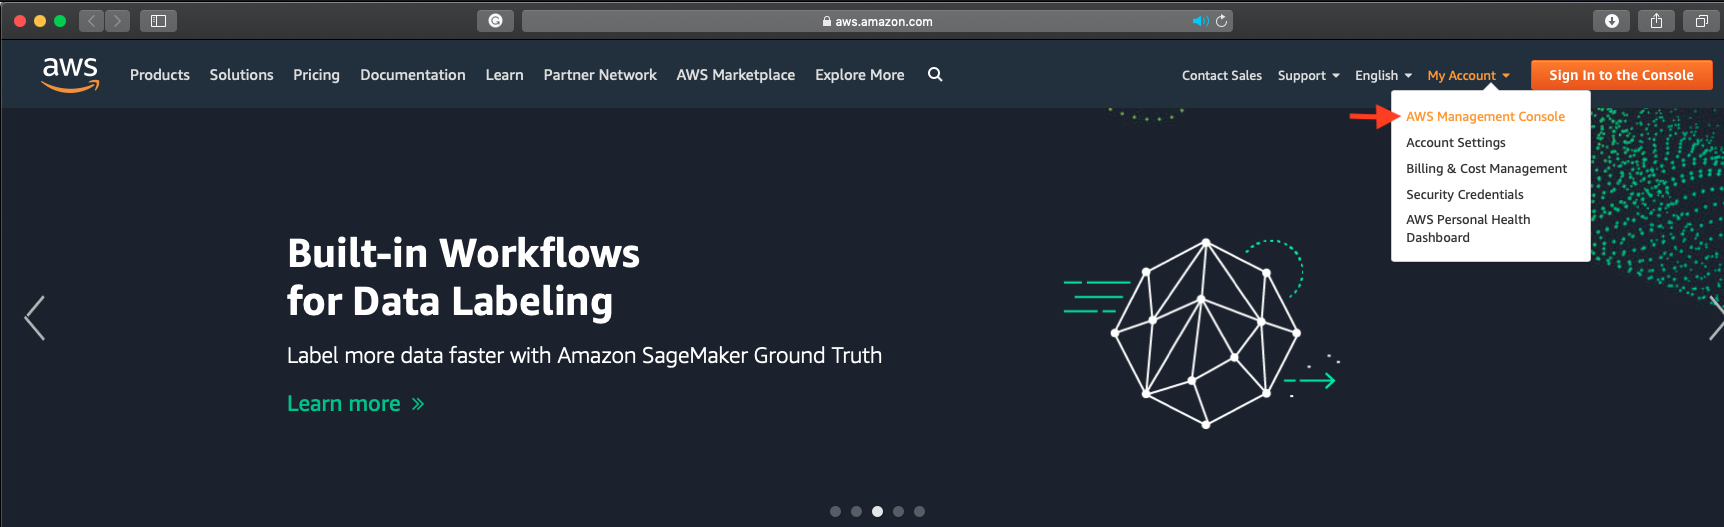
Go to https://aws.amazon.com/ and log in
-
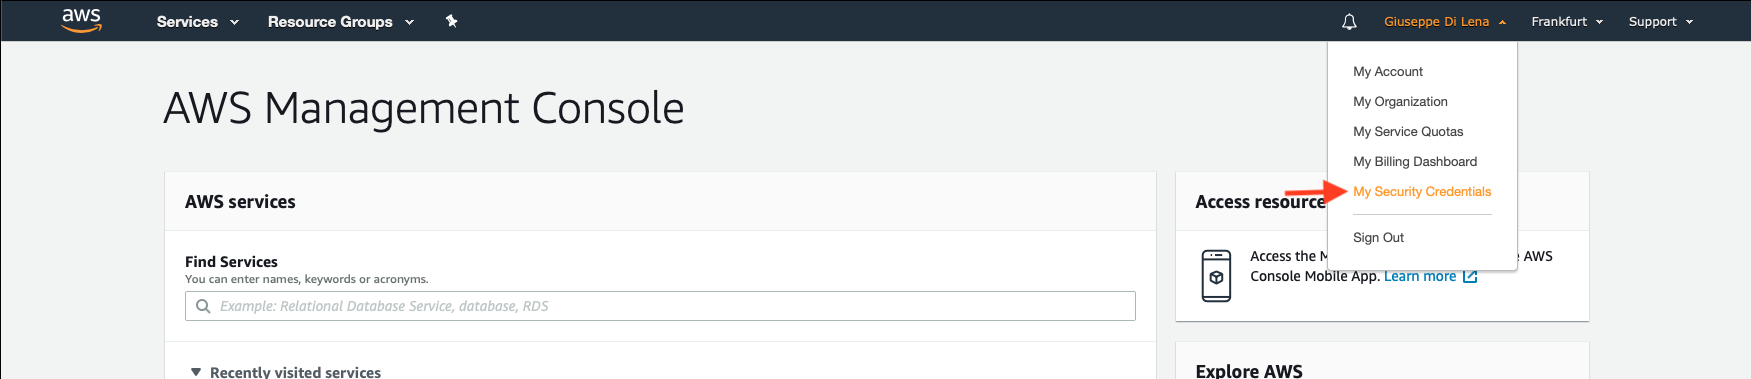
Click on your username and go to “My security Credentials”
-
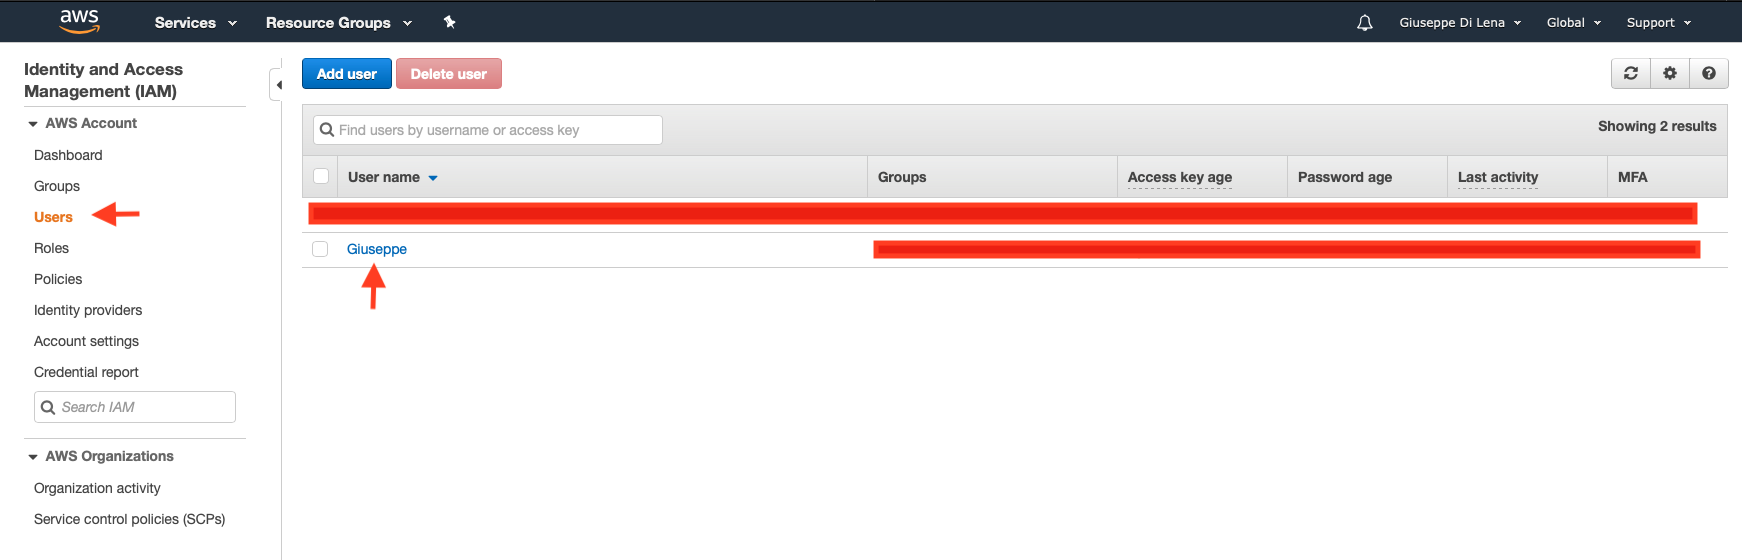
On the left panel, click on “Users” and then click on your User name(be sure that it has the right permissions)
-
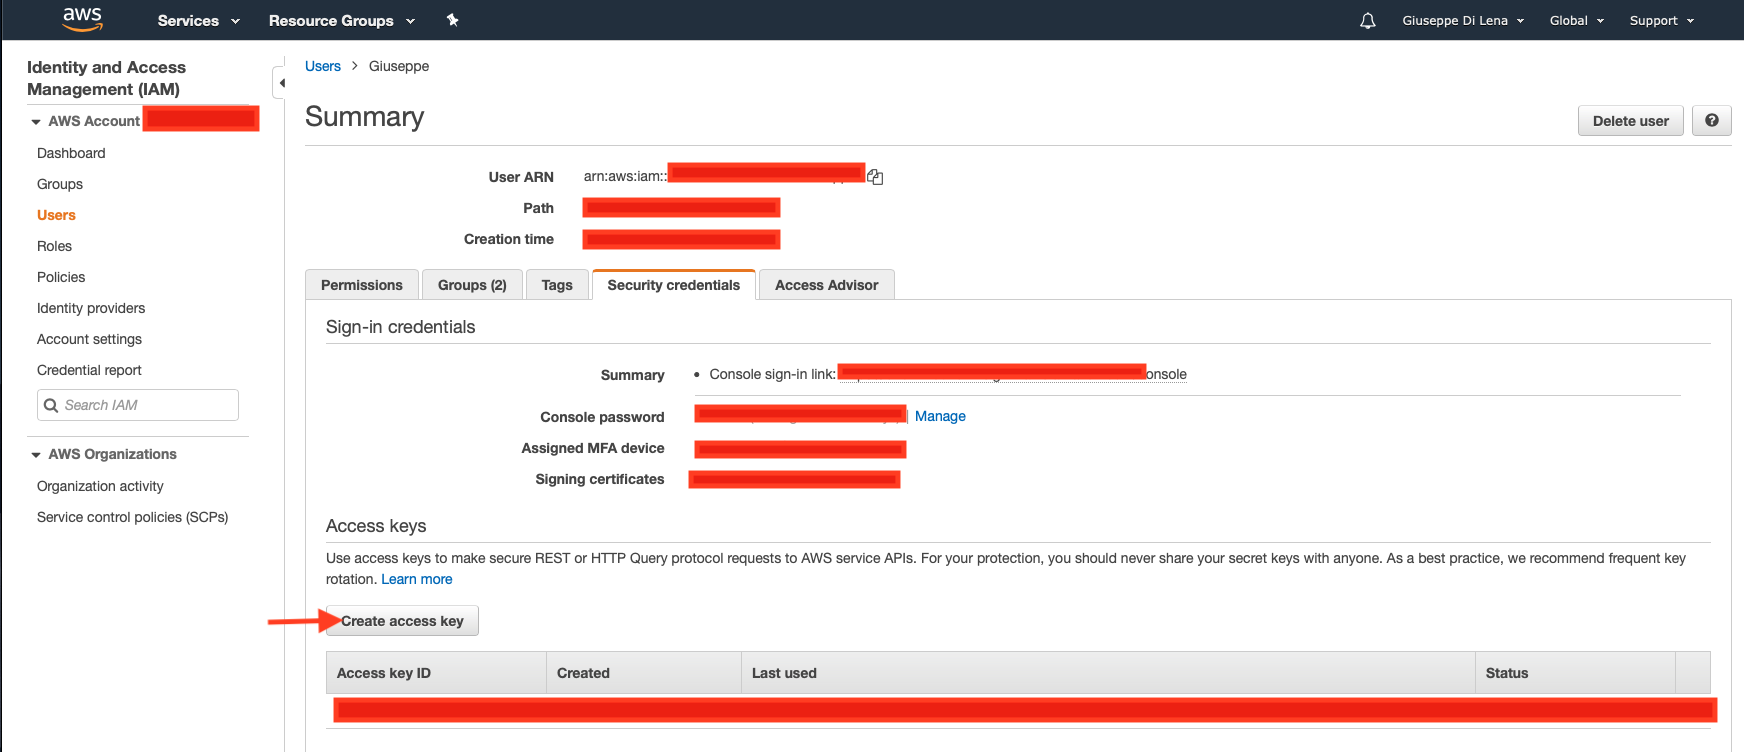
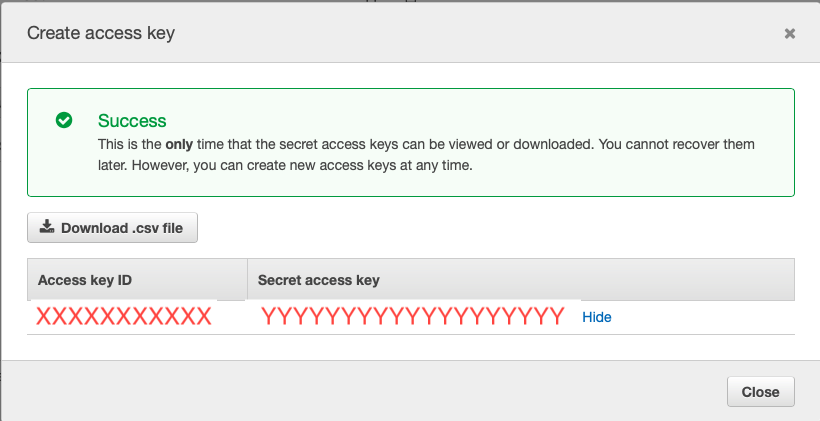
On the summary, panel click on “Create access key”
-
Congratulations: you have a new Access Key ID and a Secret access key
-
You need to import your ssh public key in AWS
If you don’t have a private and public key created in your system, you can generate it with:
ssh-keygen
For this version, you need to leave the default values as shown below
root@53942a77d770:# ssh-keygen
Generating public/private rsa key pair.
Enter file in which to save the key (/root/.ssh/id_rsa):
Created directory '/root/.ssh'.
Enter passphrase (empty for no passphrase):
Enter same passphrase again:
Your identification has been saved in /root/.ssh/id_rsa.
Your public key has been saved in /root/.ssh/id_rsa.pub.
The key fingerprint is:
SHA256:zmU65OeCHb/zjBJQOTmSUW9vonTTsOdv9Sv6+VCUtoI root@53942a77d770
The key's randomart image is:
+---[RSA 2048]----+
|      .+.o       |
|      o *.      .|
|       o o+    + |
|      .  . =. o .|
|       .S BE=. o |
|       *o* *  o .|
|       oB+. .. ..|
|      . ++oo o+ .|
|         o+==++o.|
+----[SHA256]-----+
- Cat your id_rsa.pub (make sure that the extension is .pub)
root@53942a77d770:/home/Distrinet# cat ~/.ssh/id_rsa.pub
ssh-rsa AAAAB3NzaC1yc2EAAAADAQABAAABAQCsLyI2hW/uoiLqcJEnAnYufUge1LhnBevdVy29tI1r93KFcQrspE2LwuwWhVxtC4QdhIIcZ1nfN5zTIWhOkIUXEc3oZcu/JEMix+ygJXoW53/6gKC/hPqZPT+d2ahyoXw+zYqOjBp3VjhHG32jfQE5oGhU3nSTVrdPj3BEnJJ0o4WHyLiwRxv5z2aATS7b0ziYU2f3Zwdf3s+zJ54Ois6/c6TtTGI0B8p2zr4CrsK5pCaUnlW0/sgOsS98wAP1NjxDxPUak2cr8ZbMA7TWLUXO11HAZaW2qgqxImsg90Wf4RQkX5GesmTglSl0W/t3Jg+3Q4idX4PgRzPl4GAMvJp7 root@53942a77d770
Import the id_rsa.pub in AWS:
-
Go to https://aws.amazon.com/ and log as shown above
-
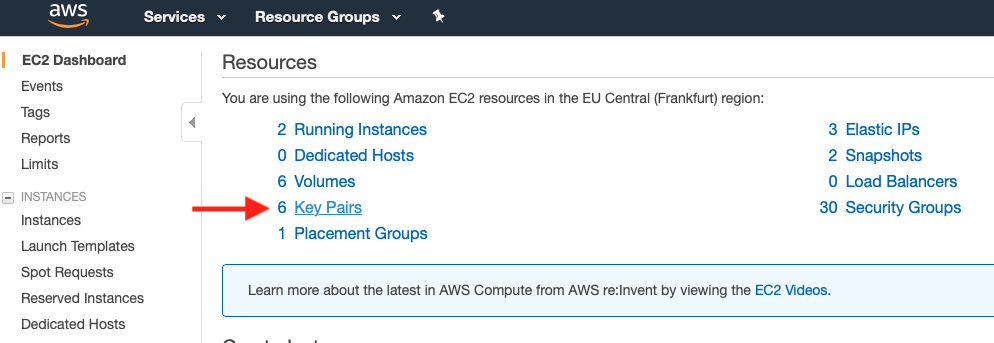
Go to “Services” –> “EC2”

-
Click on “Key Pairs”
-
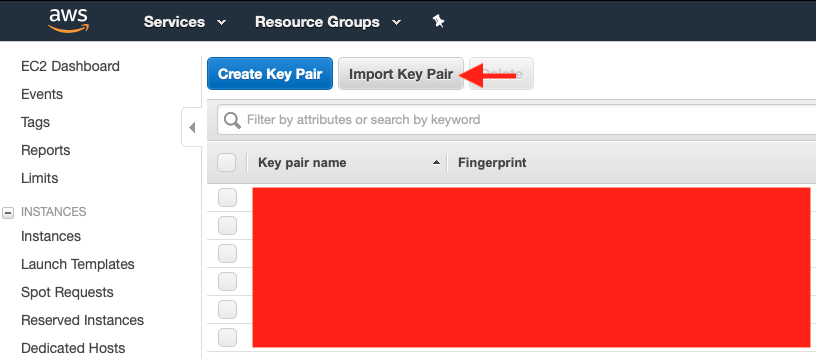
• Choose “Import Key Pair”
-
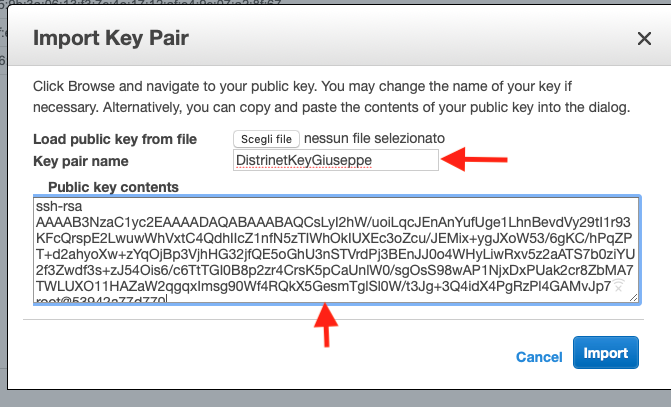
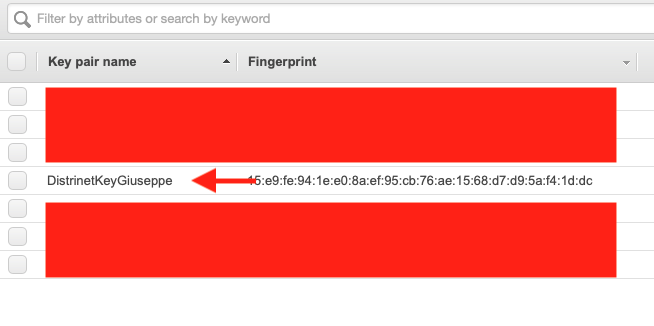
Choose any name you want - in my case I chose “DistrinetKeyGiuseppe”(you need to use this name after) - paste your id_rsa.pub in “Public key contents” and import it.
-
You can see now that your key has been added
Distrinet configuration
If Distrinet is installed correctly, you have a configuration file is in your home directory. You can open it with:
vim ~/.distrinet/conf.yml
The result should be similar to this:
---

ssh:
  pub_id: "YOUR PUBLIC ID"
  user: "root"
  client_keys: ["/Users/giuseppe/.ssh/id_rsa"]
  bastion: "Bastion host IP 'xxx.xxx.xxx.xxx'"

port_forwarding:
  - local: 8181
    proto: 'tcp'
    ip: '192.168.0.250'
    remote: 8181

aws:
  region: "eu-central-1"
  user: "ubuntu"
  image_name: "ubuntu/images/hvm-ssd/ubuntu-bionic-18.04-amd64-server-20190722.1"
  key_name_aws: "id_rsa"
  network_acl:
    - IpProtocol: "-1"
      FromPort: 1
      ToPort: 65353
      IpRanges:
        - CidrIp: "0.0.0.0/0"

g5k:
  g5k_user: "your username"
  g5k_password: "your password"
  image_name: "ubuntu1804-x64-python3"
  location: "nancy"
  cluster: "grisou"

cluster:
  user: "root"
Three parameters need to be modified now:
- ssh -> pub_id: you have to put the same public key that you imported in AWS in the previous step,
- ssh -> client_keys: you have to put in a list the path of your private key,
- aws -> key_name_aws: here you have to put the keypair name you choose in the previous step.
Following the previous AWS configuration, my configuration file is:
---

ssh:
  pub_id: "ssh-rsa AAAAB3NzaC1yc2EAAAADAQABAAABAQCsLyI2hW/uoiLqcJEnAnYufUge1LhnBevdVy29tI1r93KFcQrspE2LwuwWhVxtC4QdhIIcZ1nfN5zTIWhOkIUXEc3oZcu/JEMix+ygJXoW53/6gKC/hPqZPT+d2ahyoXw+zYqOjBp3VjhHG32jfQE5oGhU3nSTVrdPj3BEnJJ0o4WHyLiwRxv5z2aATS7b0ziYU2f3Zwdf3s+zJ54Ois6/c6TtTGI0B8p2zr4CrsK5pCaUnlW0/sgOsS98wAP1NjxDxPUak2cr8ZbMA7TWLUXO11HAZaW2qgqxImsg90Wf4RQkX5GesmTglSl0W/t3Jg+3Q4idX4PgRzPl4GAMvJp7 root@53942a77d770"
  user: "root"
  client_keys: ["/root/.ssh/id_rsa"]
  bastion: "Bastion host IP 'xxx.xxx.xxx.xxx'"

port_forwarding:
  - local: 8181
    proto: 'tcp'
    ip: '192.168.0.250'
    remote: 8181

aws:
  region: "eu-central-1"
  user: "ubuntu"
  image_name: "ubuntu/images/hvm-ssd/ubuntu-bionic-18.04-amd64-server-20190722.1"
  key_name_aws: "DistrinetKeyGiuseppe"
  network_acl:
    - IpProtocol: "-1"
      FromPort: 1
      ToPort: 65353
      IpRanges:
        - CidrIp: "0.0.0.0/0"

g5k:
  g5k_user: "your username"
  g5k_password: "your password"
  image_name: "ubuntu1804-x64-python3"
  location: "nancy"
  cluster: "grisou"

cluster:
  user: "root"
Configuration test
To run your first experiment, you need to move in the Mininet directory inside Distrinet. In this case, Distrinet is in /Distrinet, so we can change directory with:
cd /Distrinet/mininet
If Distrinet is in your Home directory you can do:
cd ~/Distrinet/mininet
Make sure to have the :mininet: in your PYTHONPATH:
export PYTHONPATH=$PYTHONPATH:mininet:
To run a simple experiment in AWS.
python3 bin/dmn --provision=aws --controller=lxcremote,ip=192.168.0.1 --mapper=ffod
The available mapper in aws are: ffod, ffdp or bfdp
Distrinet, in this case, does not start automatically the controller, so you need to start it manually in the master host. You can find the master host ip from the AWS web interface.
After five minutes, you should see the Mininet console. Don’t worry about the error that you see. 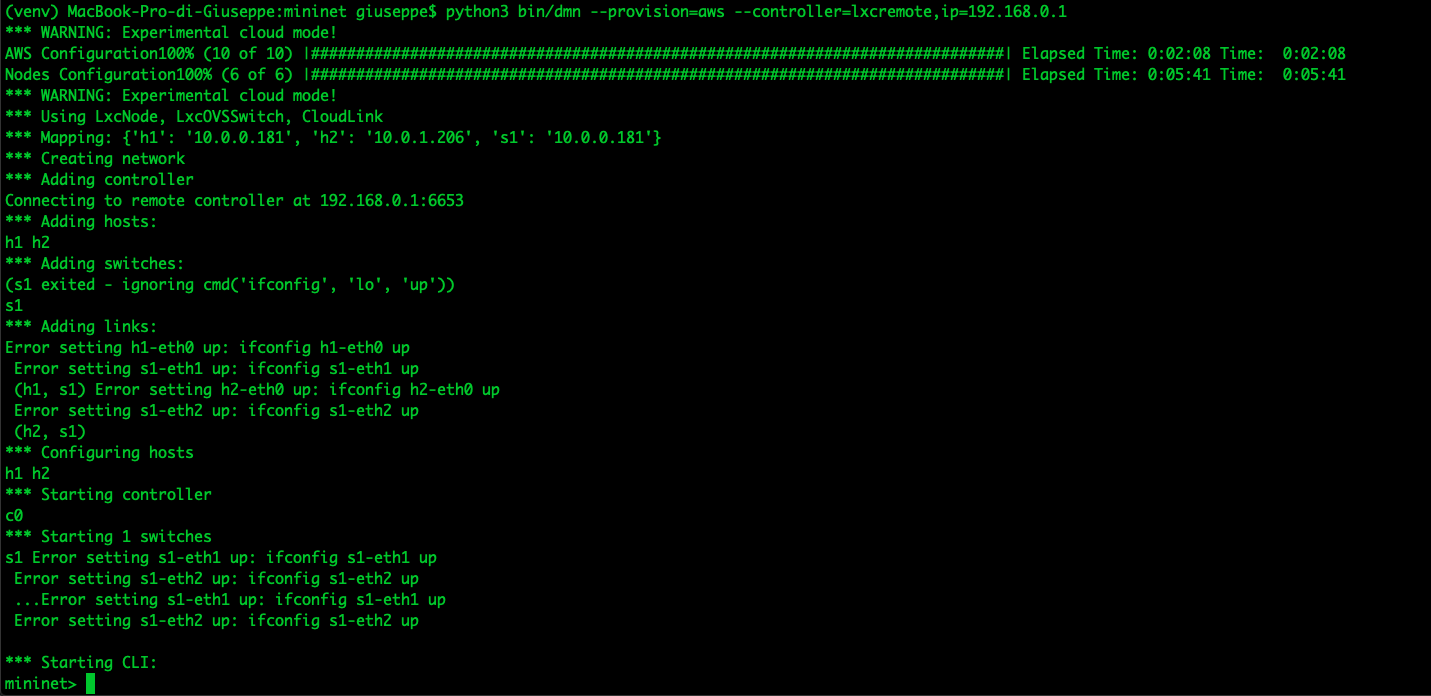 If you try to do pingall or pingallfull, the host will not be able to ping. This is because there is no controller connected.
Find the public ip of your deployment with the AWS web interface. 
In this case, we can connect with:
ssh root@3.124.70.157
Once connected, we can start the ryu controller:
ryu-manager /usr/lib/python2.7/dist-packages/ryu/app/simple_switch_13.py --verbose
After some seconds, we are able to run pingall from the Mininet CLI. 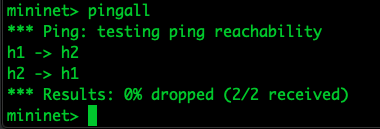
Type “exit” to conclude the experiment.
Warning: to read carefully
Exiting distrinet will not remove your AWS environment,so you will continue to pay for the instances you created. You can destroy the virtual instances manually or by using the command:
python3 bin/dmn --purge=VPC_ID
The VPC_ID can be found in the AWS web interface: 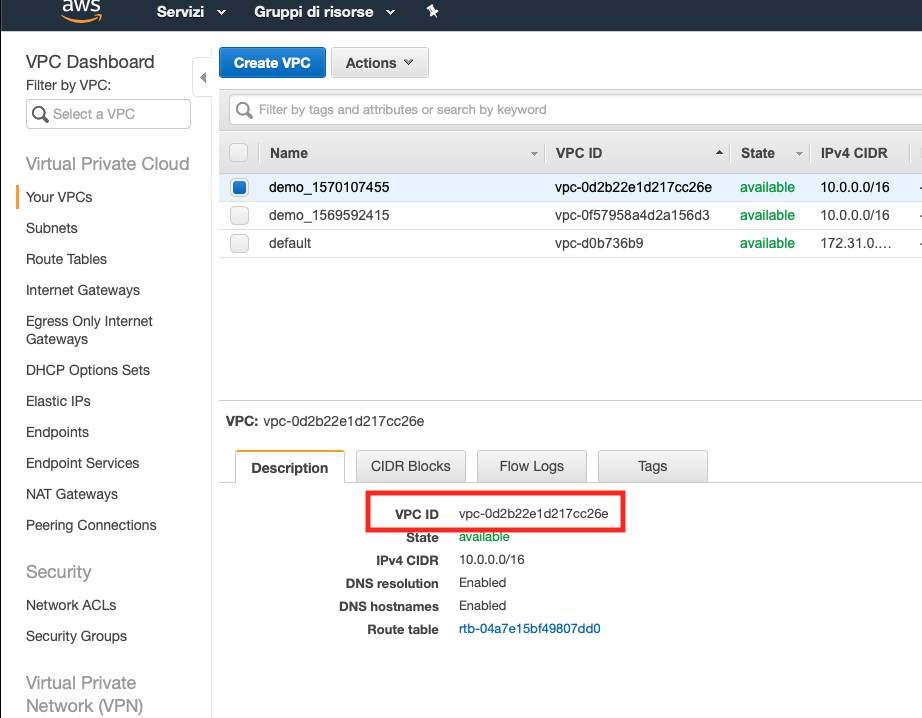
python3 bin/dmn --purge=vpc-0d2b22e1d217cc26e
This will take a couple of minutes
